tomarnidhi
Well-known member
You will Need :
Basic sewing skills and a sewing machine
3 medium rugs
Zipper (optional)
Filler*
*For the filler you can choose to buy polystyrene beads, fill it with foam filler, or repurpose old duvets and pillows.
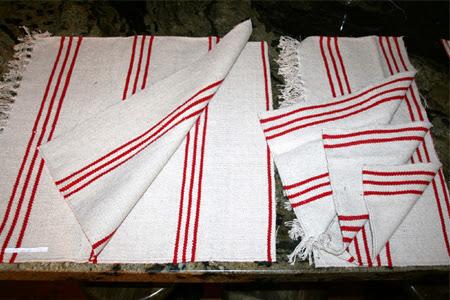
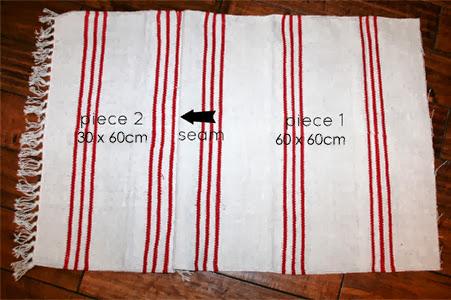
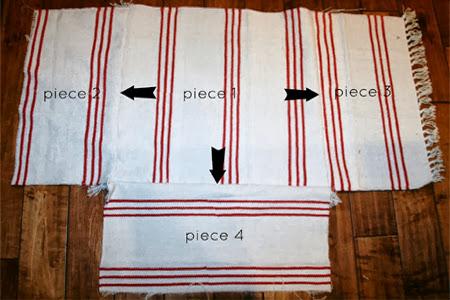
I started by cutting down one rug into two pieces. One piece should measure 60cm x 60cm (or close to that as the widths of the rugs vary), and the other piece should measure around 30cm x 60cm.

Cut down a second rug the exact same way. You should now have 2 of 60cm x 60cm pieces, and 2 of 30cm x 60cm pieces.
Finally, cut your third rug down so that you have an additional 2 of 30cm x 60cm pieces...for a grand total of 2 of 60cm x 60cm pieces and 4 of 30cm x 60cm pieces.
Follow the pictorial below for assembling all the pieces together.

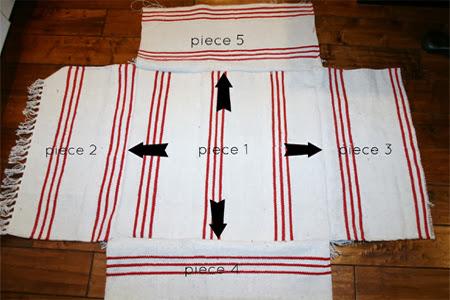

Once all six pieces are attached, you need to sew the corners. The white arrows indicate where you should do this.
Here's what it should look like after the corners are sewed together.
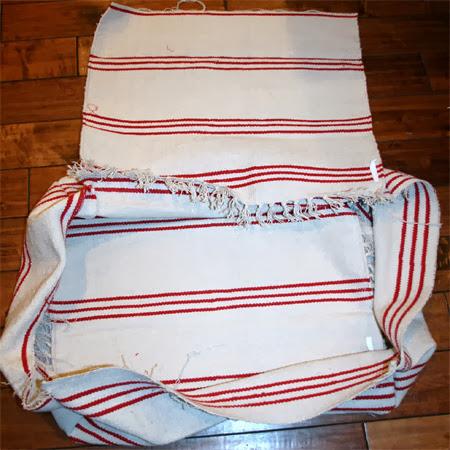
Now you need to attach two sides of the bottom of the pouf. The picture indicates where to do this.

NOTE: I realized after I'd made it to this point, that you want both edges hemmed so they have a nice, clean edge. I lucked out, one of my edges was the selvage edge of the rug, but the other I had to hem under.

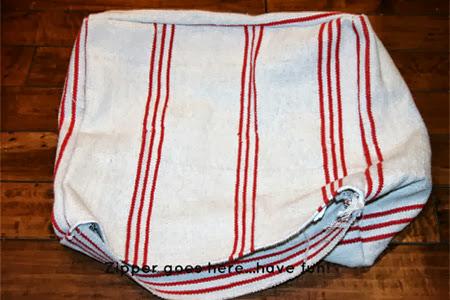
I turned the pouf ride side out, and slid one side of the zipper under one side of the opening. I pinned it in place and sewed the length of the zipper.

Then I unzipped the zipper so that I could work with the other side. I did the same as before, and slid the other side of the zipper under the other side of the opening, pinned and stitched the length of the zipper.
At this point, you could turn your pouf inside out and reinforce the zipper by stitching just above the top of the zipper, and just below the bottom of the zipper. My zipper was just slightly shorter than the opening, so I had a little gap at one end that I needed to hem shut. If you run into this same problem, it's no big deal.
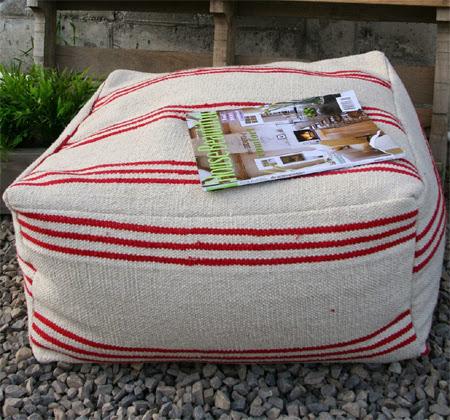
Here's what it should look like after getting filled.